

Running your store on Cartazu
Everything you need to set up a storefront, take real orders, and keep them moving — written for the person running the business, not the software behind it.
Getting started
Welcome
Cartazu gives you a storefront, a checkout, and a dashboard to run both — without needing a developer. This guide walks through the whole loop: build your store, list what you sell, connect a way to get paid, and handle orders as they come in.
Read it in order if you're just starting out, or jump straight to the section you need from the sidebar.
Nothing here is permanent. You can change your theme, add or remove products, and edit your pages at any time — a shopper only ever sees what you've published, never what you're currently editing.
Getting started
Creating your first store
When you sign up, you're creating an account — your store is a separate thing you create from inside it. Most merchants run one store, but your account can hold more than one if you sell under different names.
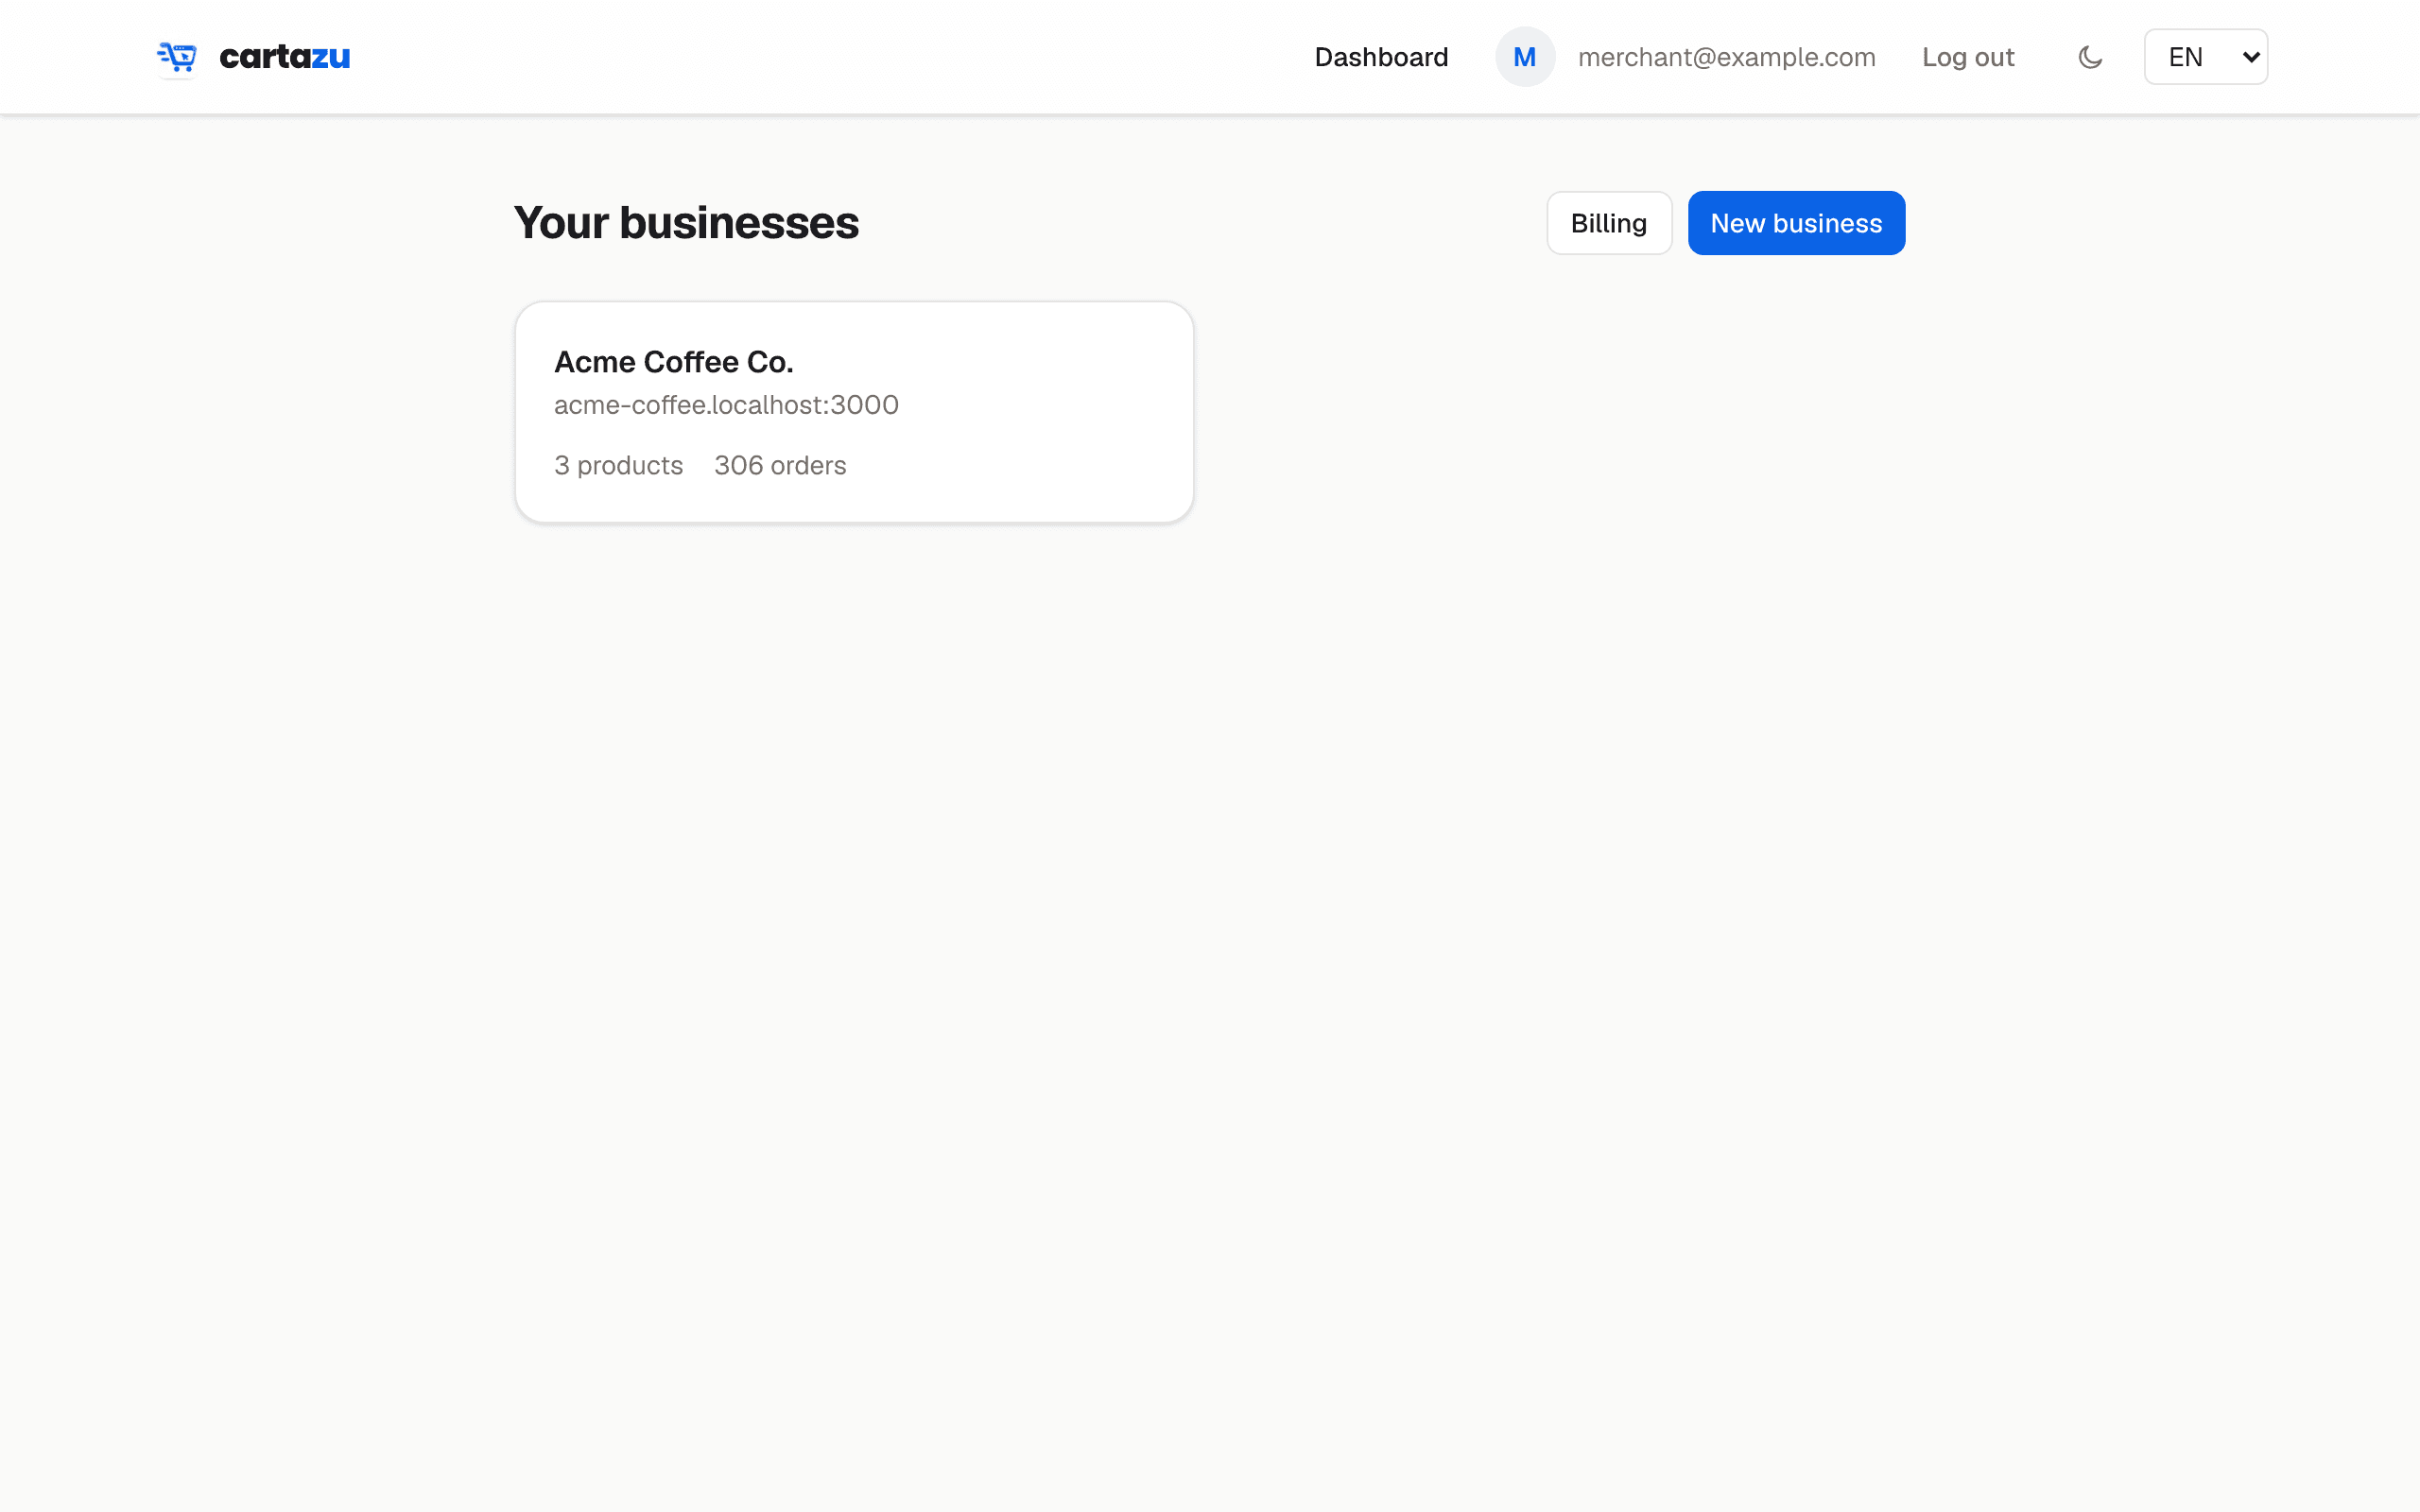
- Sign up with your emailYou'll land on your business list — empty, the first time.
- Choose a name and a web addressYour store's address is a subdomain of cartazu.com (like yourshop.cartazu.com). Pick something short and easy to say out loud — you can add your own domain name later from store settings.
- Land in your new dashboardThis is where you'll spend most of your time: products, orders, design, and settings all live here, scoped to this one store.
Running more than one shop? Open the business switcher at the top of the sidebar to jump between them, or start a new one from the New business button on your business list. Your plan sets a limit on how many you can run at once.
Getting started
A tour of your dashboard
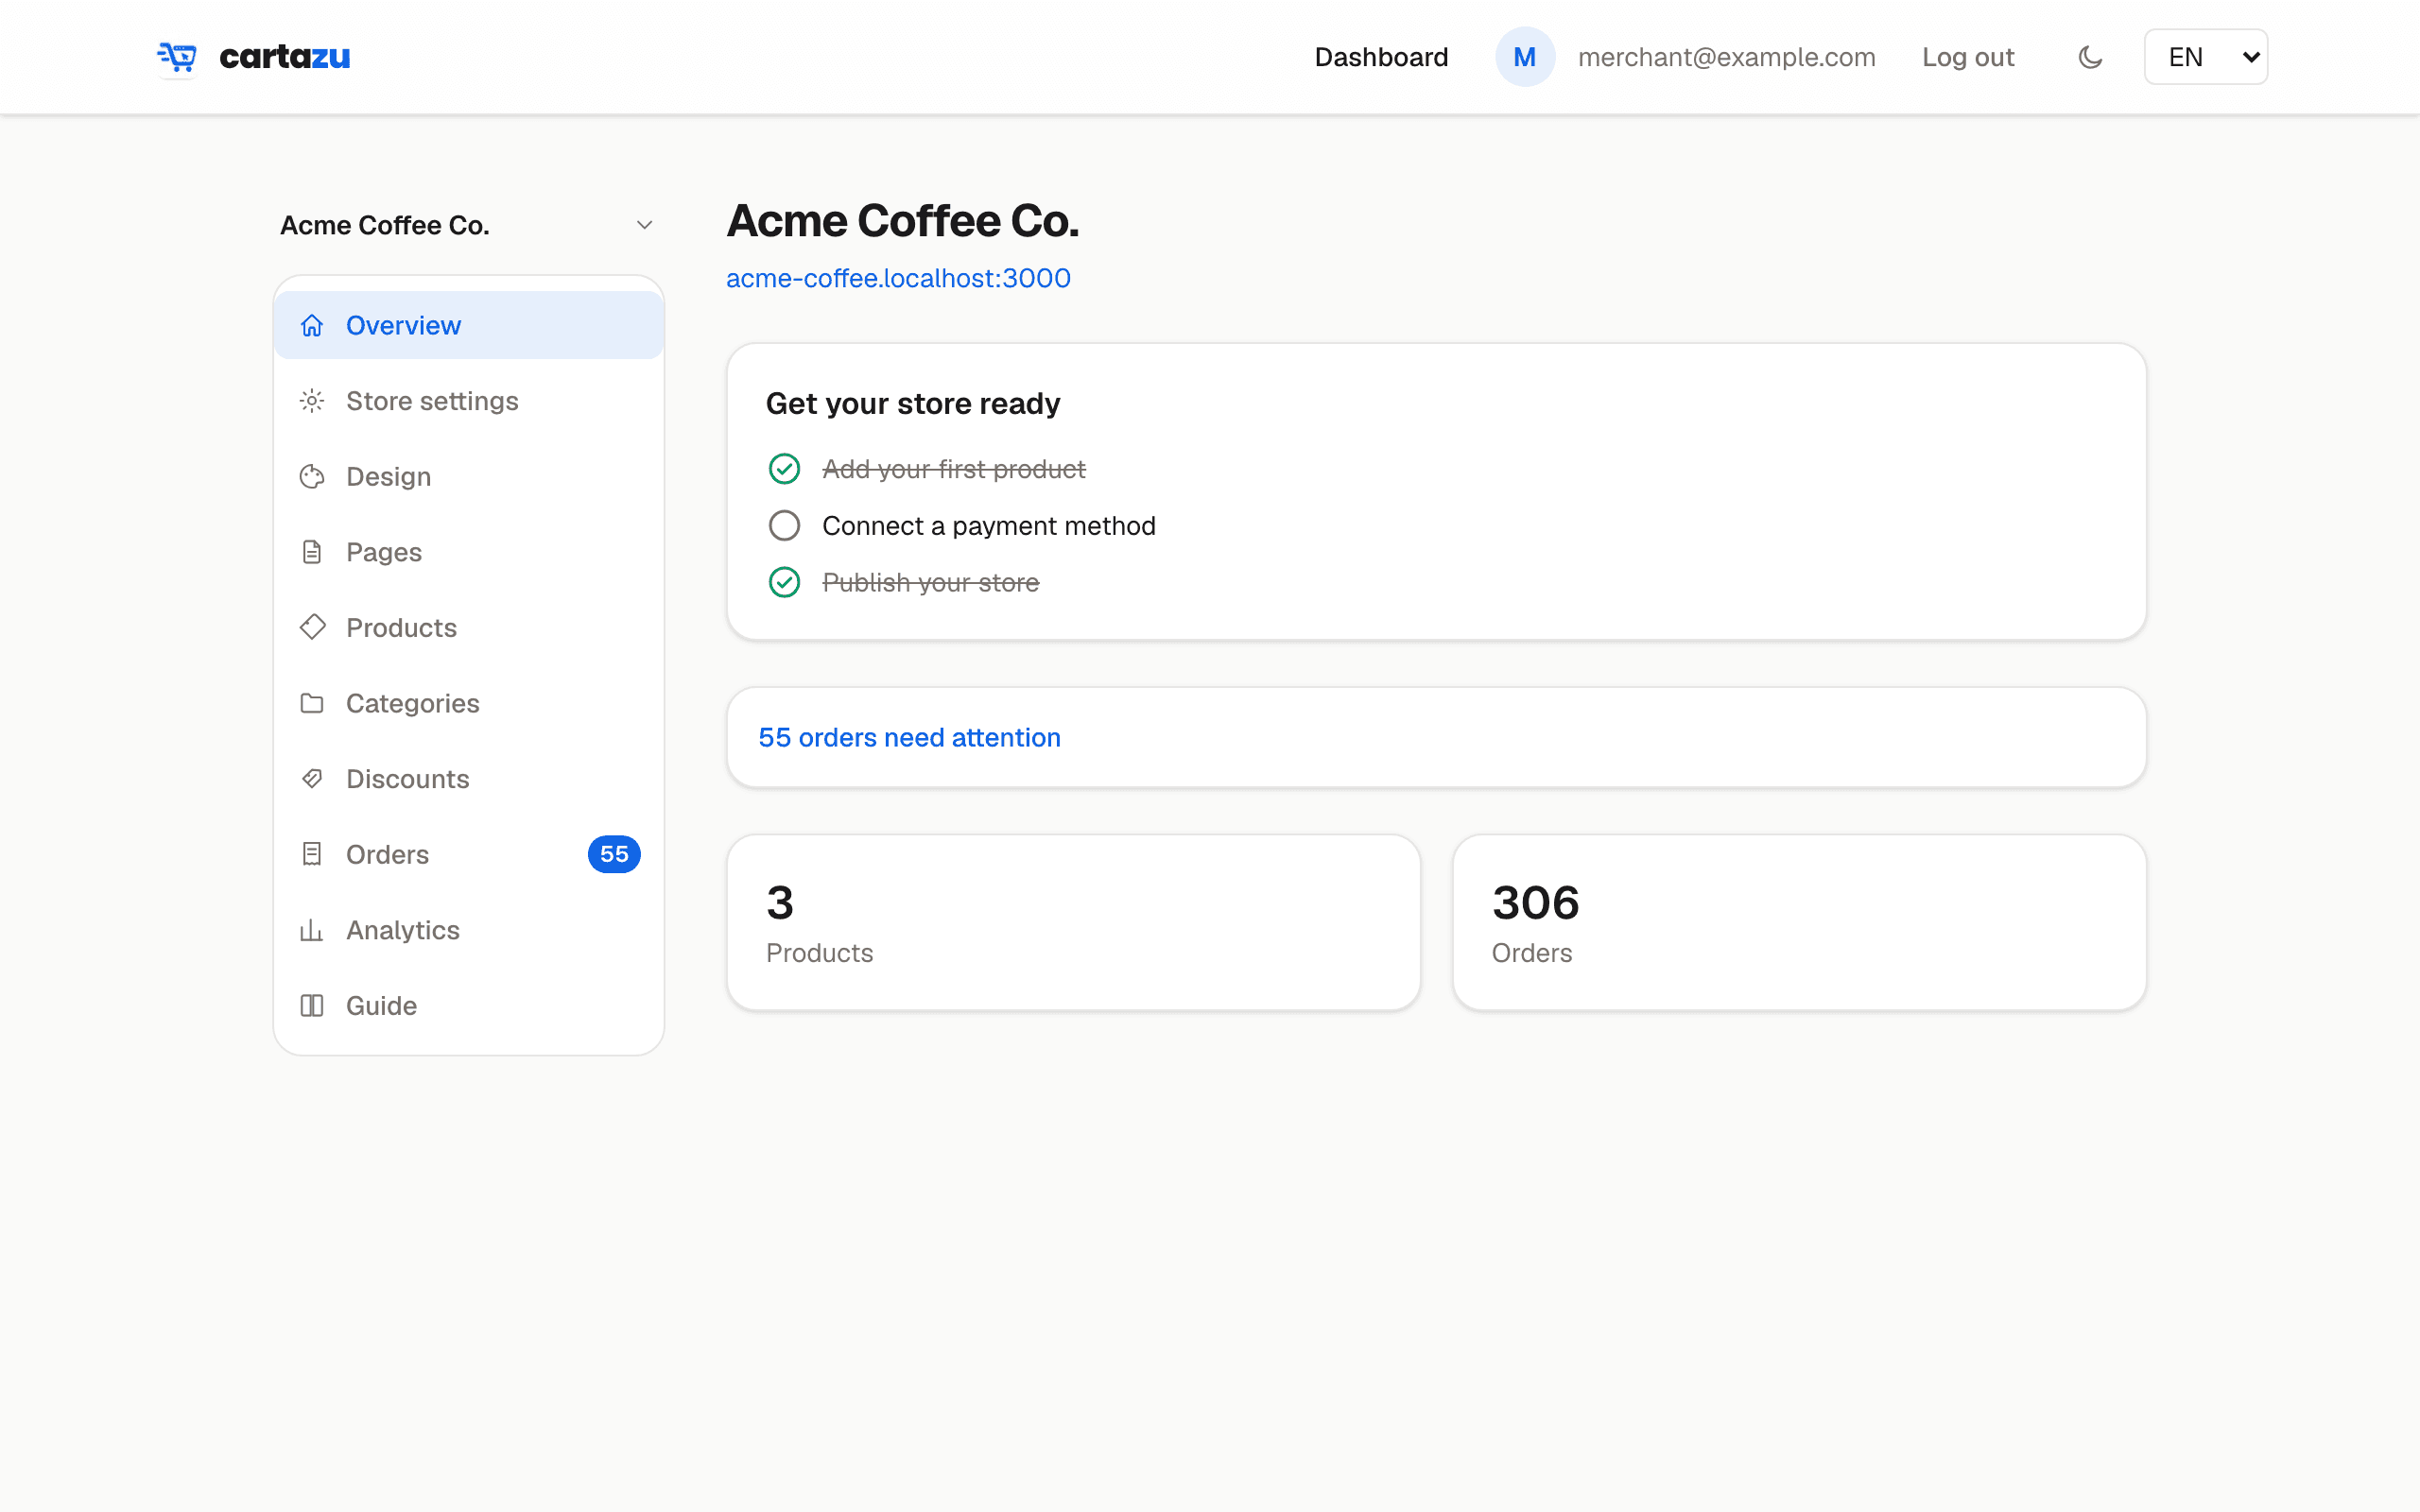
Your dashboard's sidebar is organized in the order you'll actually use it: settings first, then how the store looks, then what you're selling, then the money.
| Section | What it's for |
|---|---|
| Overview | Your at-a-glance home — product and order counts, a setup checklist until you've finished the basics, and a flag for any order that needs attention. |
| Store settings | Name, logo, contact details, payment method, tax, and delivery. |
| Design | The page builder and your theme — colors, fonts, layout. |
| Pages | Custom pages like About or FAQ, and your site navigation. |
| Products / Categories | Your catalog. |
| Discounts | Promo codes. |
| Orders | Every order placed, with actions to confirm, fulfill, or refund. |
| Customers | Everyone who's registered an account at your store, plus their order history and loyalty points if you've turned that on. |
| Analytics | Revenue, traffic, and what's actually selling. |
The setup checklist on your Overview page tracks three things — adding a product, connecting a payment method, and publishing — and quietly disappears once all three are done.
Building your storefront
The page builder
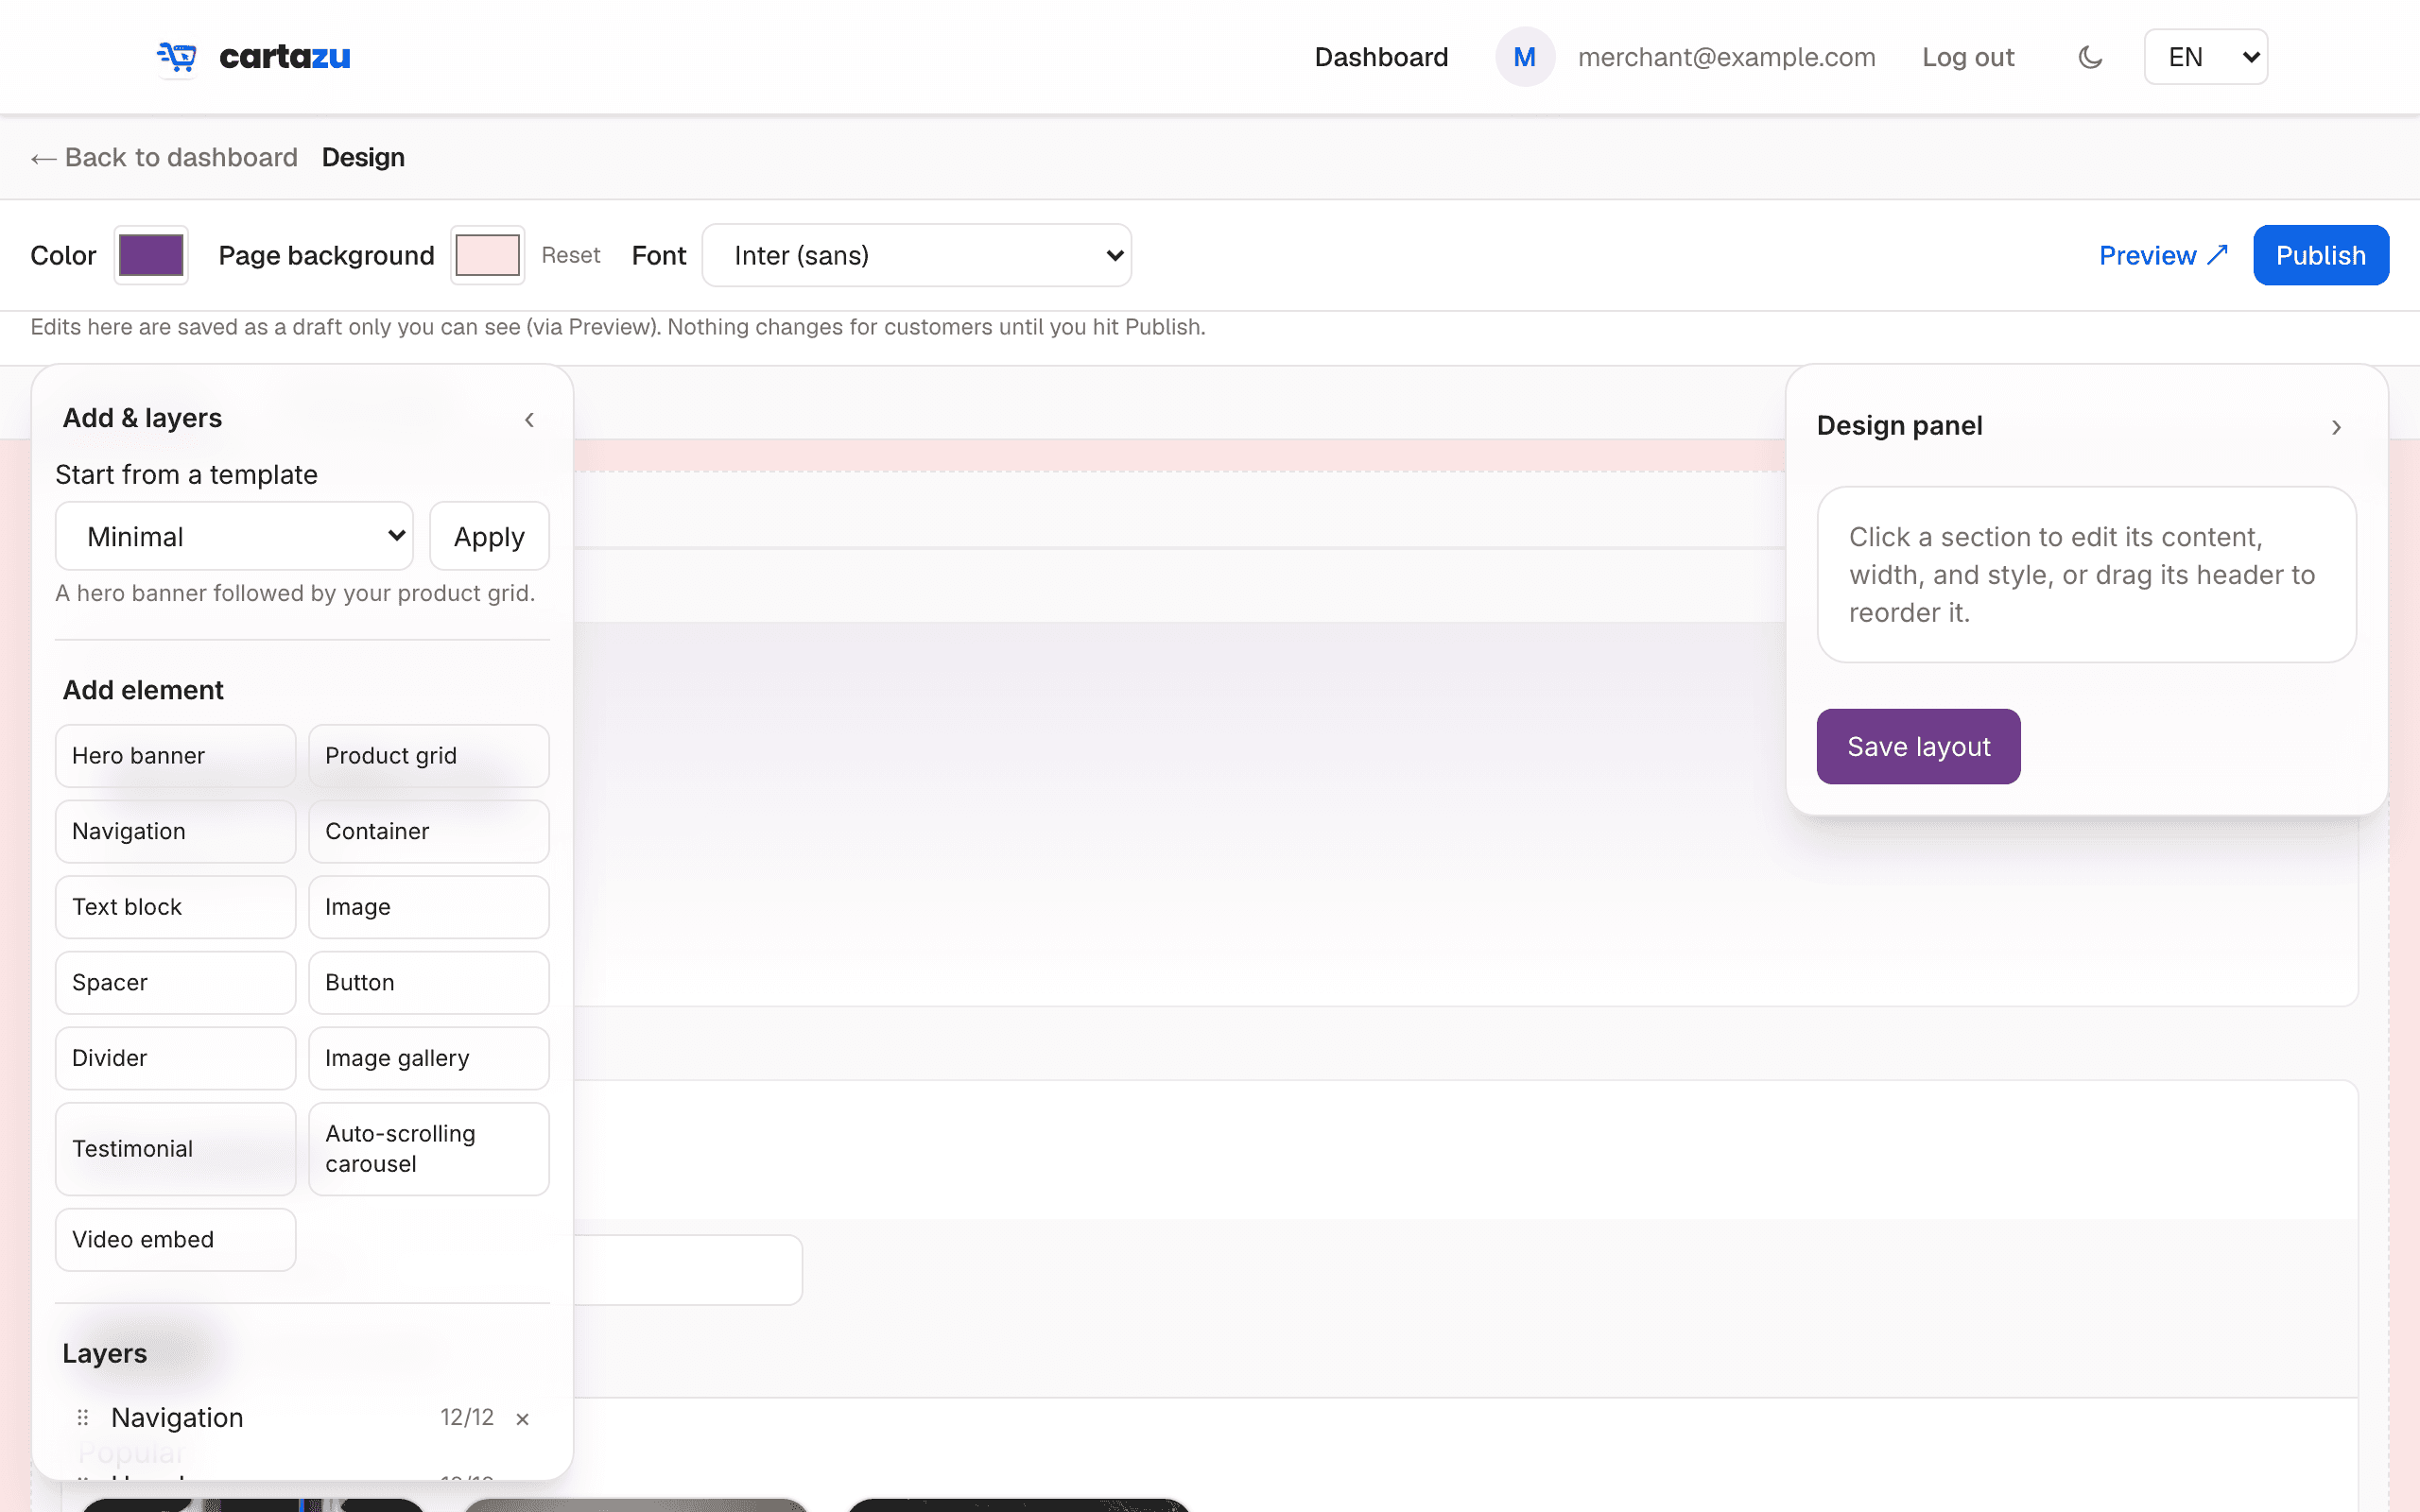
Your homepage, your product pages, and any custom page are all built from the same set of building blocks, called sections. Add a section, drag it into position, and fill in its content — no code, no template files.
Hero
A big banner with a heading, an image, and a button — usually the first thing a visitor sees.
Product grid
Shows your catalog. Can group by category and add a search box — see Categories & search.
Text / Image / Gallery
Plain content blocks for anything a hero or product grid doesn't cover.
Testimonial / Carousel
Social proof and scrolling image strips.
Draft and live are separate
Every change you make in the builder saves to a draft. Shoppers keep seeing your current live version until you hit Publish — so you can rework a section in peace and only go live when it's ready.
Free-plan stores can build and preview a storefront, but can't publish it. You'll still see your own work-in-progress when logged in; a shopper visiting the address sees a "not open yet" message until you're on a paid plan.
Custom styling
Most sections let you override their background, padding, borders, and text style individually — useful for making one section (like your hero) stand out from the rest without changing your whole theme.
Building your storefront
Theme & branding
Your theme sets the accent color and font used across your whole storefront — buttons, links, headings — so you can match your brand without touching every section individually.
Upload a logo and it appears in your browser tab and wherever your store name is referenced. Add a short description too — it's what shows up when your store link is shared elsewhere.
Announcement banner. Turn on a popup for a sale or a temporary closure from Store settings — it shows once per visitor per browsing session, not on every single page view.
Building your storefront
Custom pages & navigation
Beyond your homepage, you can add pages like About, FAQ, Contact, or a plain policy page — built with the same sections as your homepage, so nothing new to learn.
Your site's navigation bar is configured once, from the Pages area, and can link to your homepage, any custom page, a product category, or an outside URL. Add, reorder, or remove links there and every page picks up the change at once.
Building your storefront
Search engine visibility (SEO)
Every product, category, and custom page automatically gets a real title and description built for Google — from its name, description, and your store name. There's nothing to turn on; it just works. You can override the generated text anywhere you want more control.
Products
Open a product and scroll to "Search engine listing (optional)" near the bottom to set its own SEO title and description.
Categories
Click Rename on a category to reveal the same two fields below its name.
Custom pages
Open a page in the page builder and use "Page settings" in the top-right of the header bar. Saves immediately — no need to hit Publish.
Getting found on Google
- Verify your domainIn Google Search Console, add your store's domain as a property and verify ownership — the same process whether you're on a subdomain or your own custom domain.
- Submit your sitemapYour store's own domain automatically serves a working sitemap.xml — submit that address under Sitemaps in Search Console.
- Request indexingUse the URL Inspection tool on your storefront's homepage and click Request Indexing to speed up Google's first crawl, instead of waiting for it to find your store on its own.
Business info counts too. Your address, phone number, and business hours from Store settings feed directly into what Google can show for your store — filling those in, not just the SEO fields, is what unlocks richer search results.
Products
Adding products
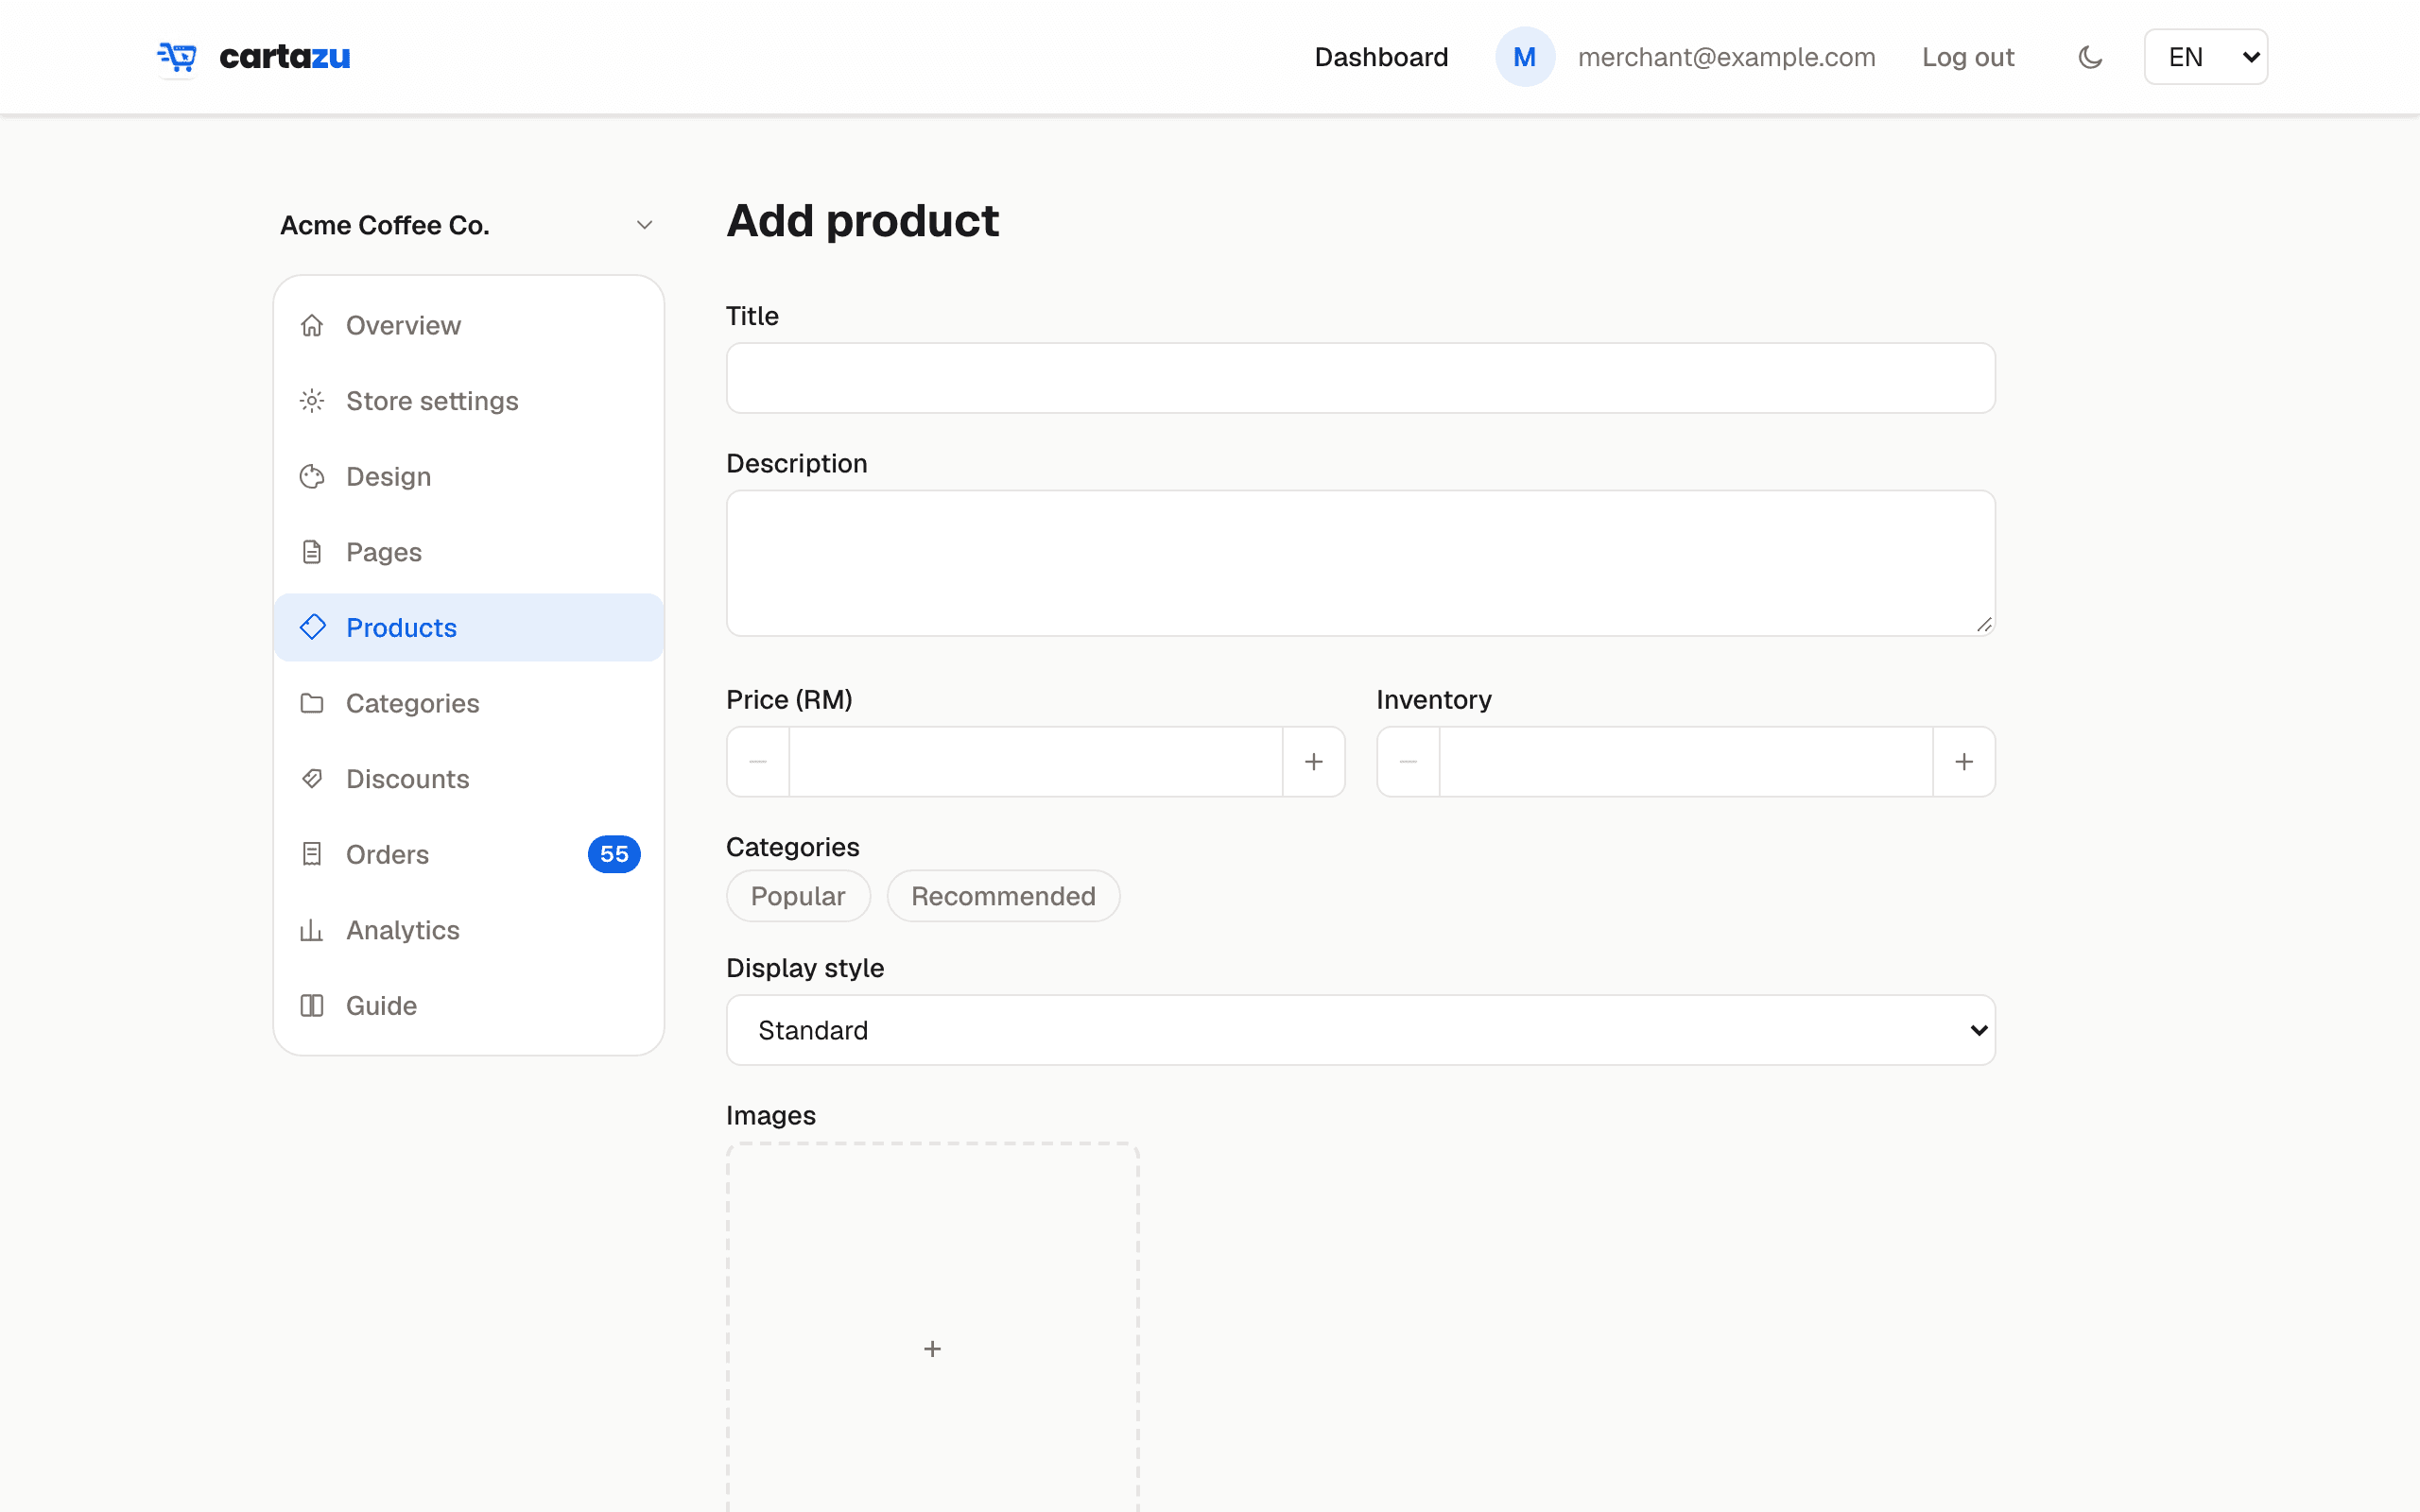
A product needs a title, a price, and at least one photo to look complete — everything else is optional.
| Field | Notes |
|---|---|
| Images | The first image is used as the product's cover everywhere it's listed. |
| Inventory | Stock decreases automatically once an order is paid — not when it's placed, so an abandoned checkout never ties up stock. |
| Variants | Options like size or color, each with their own price and stock if needed. |
| Categories | A product can sit in more than one — useful for something that's both a bestseller and a new arrival. |
| Card style | Standard, compact, or featured — controls how a product's card looks in your grid. |
Out of stock hides the buy button, not the product. Shoppers can still see and read about it — set inventory back above zero the moment you're restocked and it's sellable again immediately.
Products
Categories, browsing & search
Once a catalog grows past a page or two, shoppers need a faster way through it than scrolling. Two things help, both opt-in from your product grid section's settings:
- Category jump links — a bar of category names that scrolls a shopper straight to that part of the page, staying pinned to the top as they browse.
- A search box — filters the visible grid live, as they type.
Separately, every storefront has its own search page at all times, so a shopper can find something by name even if your homepage layout doesn't include a product grid at all.
Getting paid
Choosing a payment method
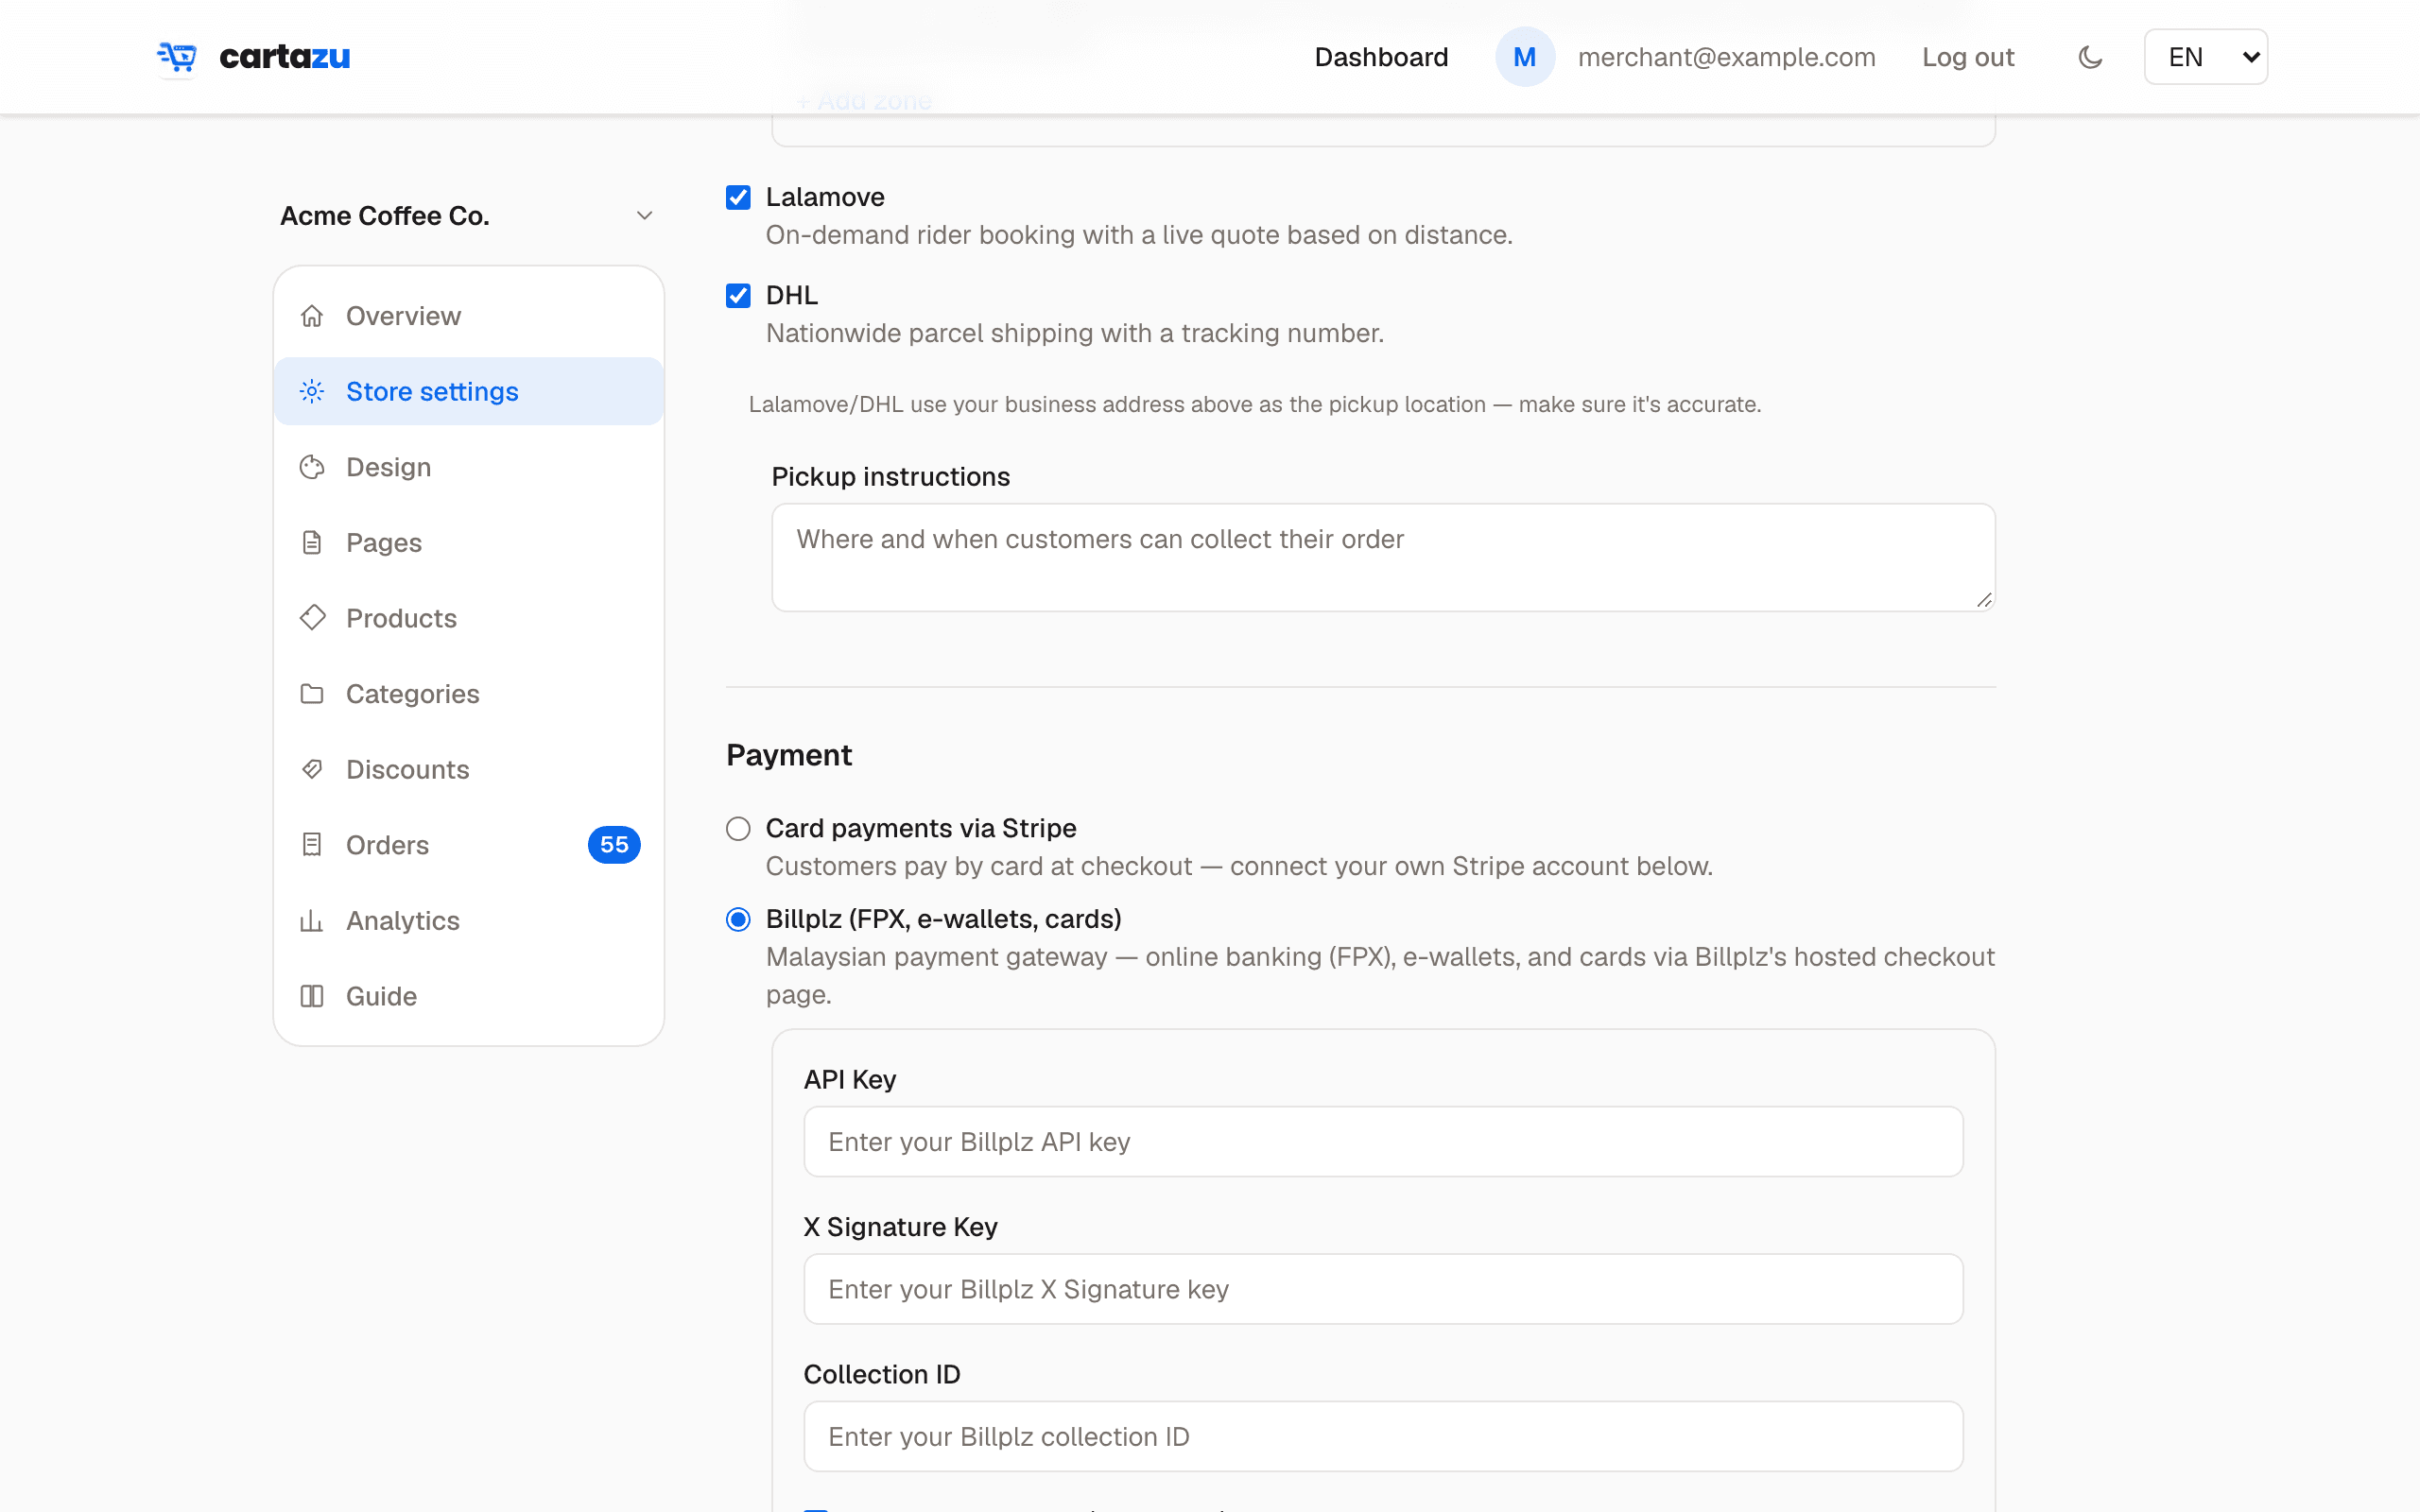
Pick one from Store settings. This is entirely separate from your own Cartazu subscription — it's how your customers pay you.
Stripe
Cards and wallets, deposited straight to your own connected Stripe account. Connect it once from Store settings — no fees are added by Cartazu on top of Stripe's own.
Billplz
Malaysian online banking (FPX). Paste your own API key and signature key from your Billplz account into Store settings — there's no one-click connect for this one.
Manual
Cash or bank transfer. The shopper uploads a screenshot of their payment; you confirm it yourself from the order once you've checked it landed.
Publishing without a working payment method leaves checkout broken. If you've picked Stripe or Billplz, finish connecting it before you tell anyone your store is open — a shopper who can't pay is a lost sale, not just an inconvenience.
Getting paid
Delivery & tax
Offer pickup, delivery, or both. Delivery pricing works one of three ways:
- One flat fee for anywhere you deliver.
- Fee by zone — set a different flat fee per area, matched against whatever city or postcode a shopper enters.
- Live courier quotes — Lalamove or DHL price the delivery for real at checkout.
Tax is a single percentage applied to every order, with a label of your choice (for example, SST) shown on receipts.
Running the business
Managing orders
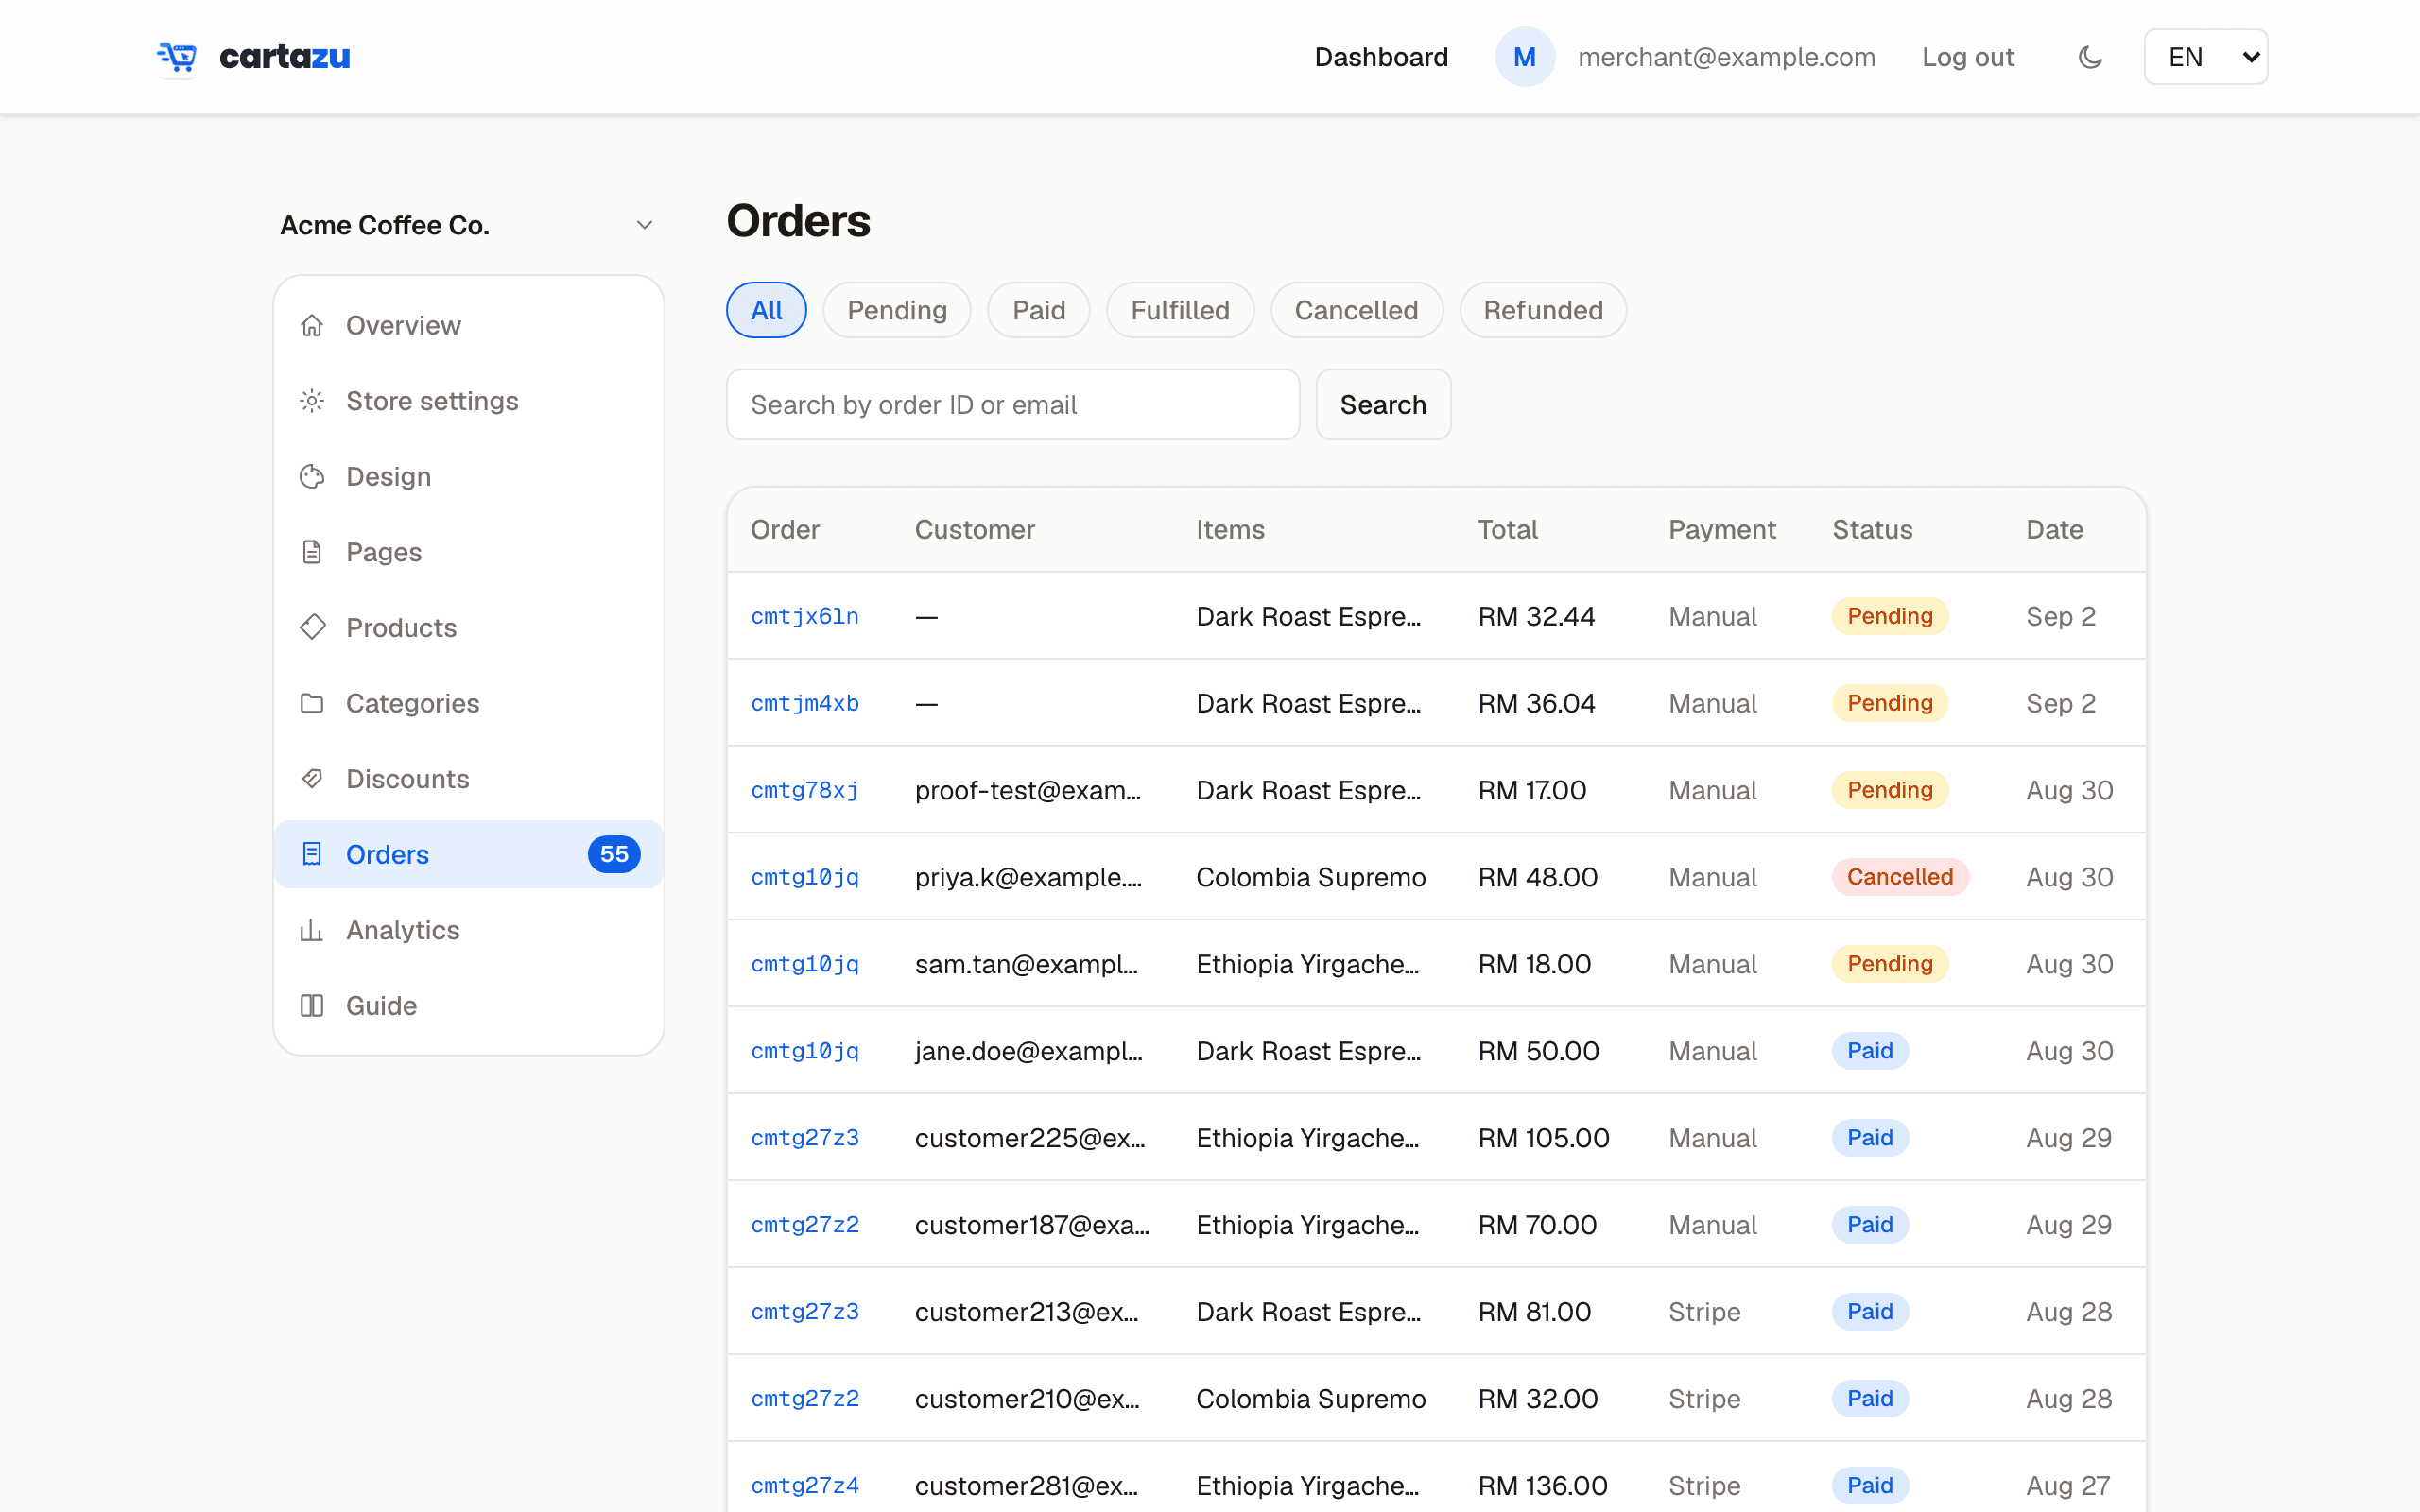
Every order moves through the same lifecycle:
Stripe and Billplz orders move to Paid on their own the moment payment clears. A Manual order needs you to check the uploaded proof and mark it paid yourself — that's the only way it moves forward.
Your customer gets an email automatically the moment an order is confirmed, and another when you mark it fulfilled — nothing to send by hand.
If something needs your attention
Your Overview page flags orders sitting in Pending far longer than normal — usually a sign a payment integration needs a second look, not that a customer is just slow to pay.
Running the business
Customers & loyalty
Shoppers can create their own account at your store — it's entirely optional, guest checkout still works exactly the same, but it saves them a step next time and lets them see their order history.
Customer accounts
A shopper can register or log in — email and password, or Continue with Google — from any product or checkout page on your storefront.
Loyalty points
Turn this on in Store settings to reward repeat customers: they earn points on every paid order and can redeem their balance for a discount at checkout. You set the earn rate, the redemption value, and a minimum balance before points can be redeemed.
See everyone who's registered — their order count, lifetime spend, and points balance — from the Customers tab in your dashboard. Open any customer to see their full order history and points ledger, and credit or debit their balance manually (with a required note) if you ever need to.
Points are only ever awarded on a paid order. A Manual order sitting Pending never earns points until you actually mark it paid — never for an order that hasn't been paid yet.
Running the business
Discount codes
Create a code, set it to a percentage or a fixed amount off, and optionally add limits — a minimum order size, an expiry date, or a cap on how many times it can be redeemed in total.
A shopper enters it at checkout; it applies to their subtotal before delivery and tax.
Running the business
Analytics
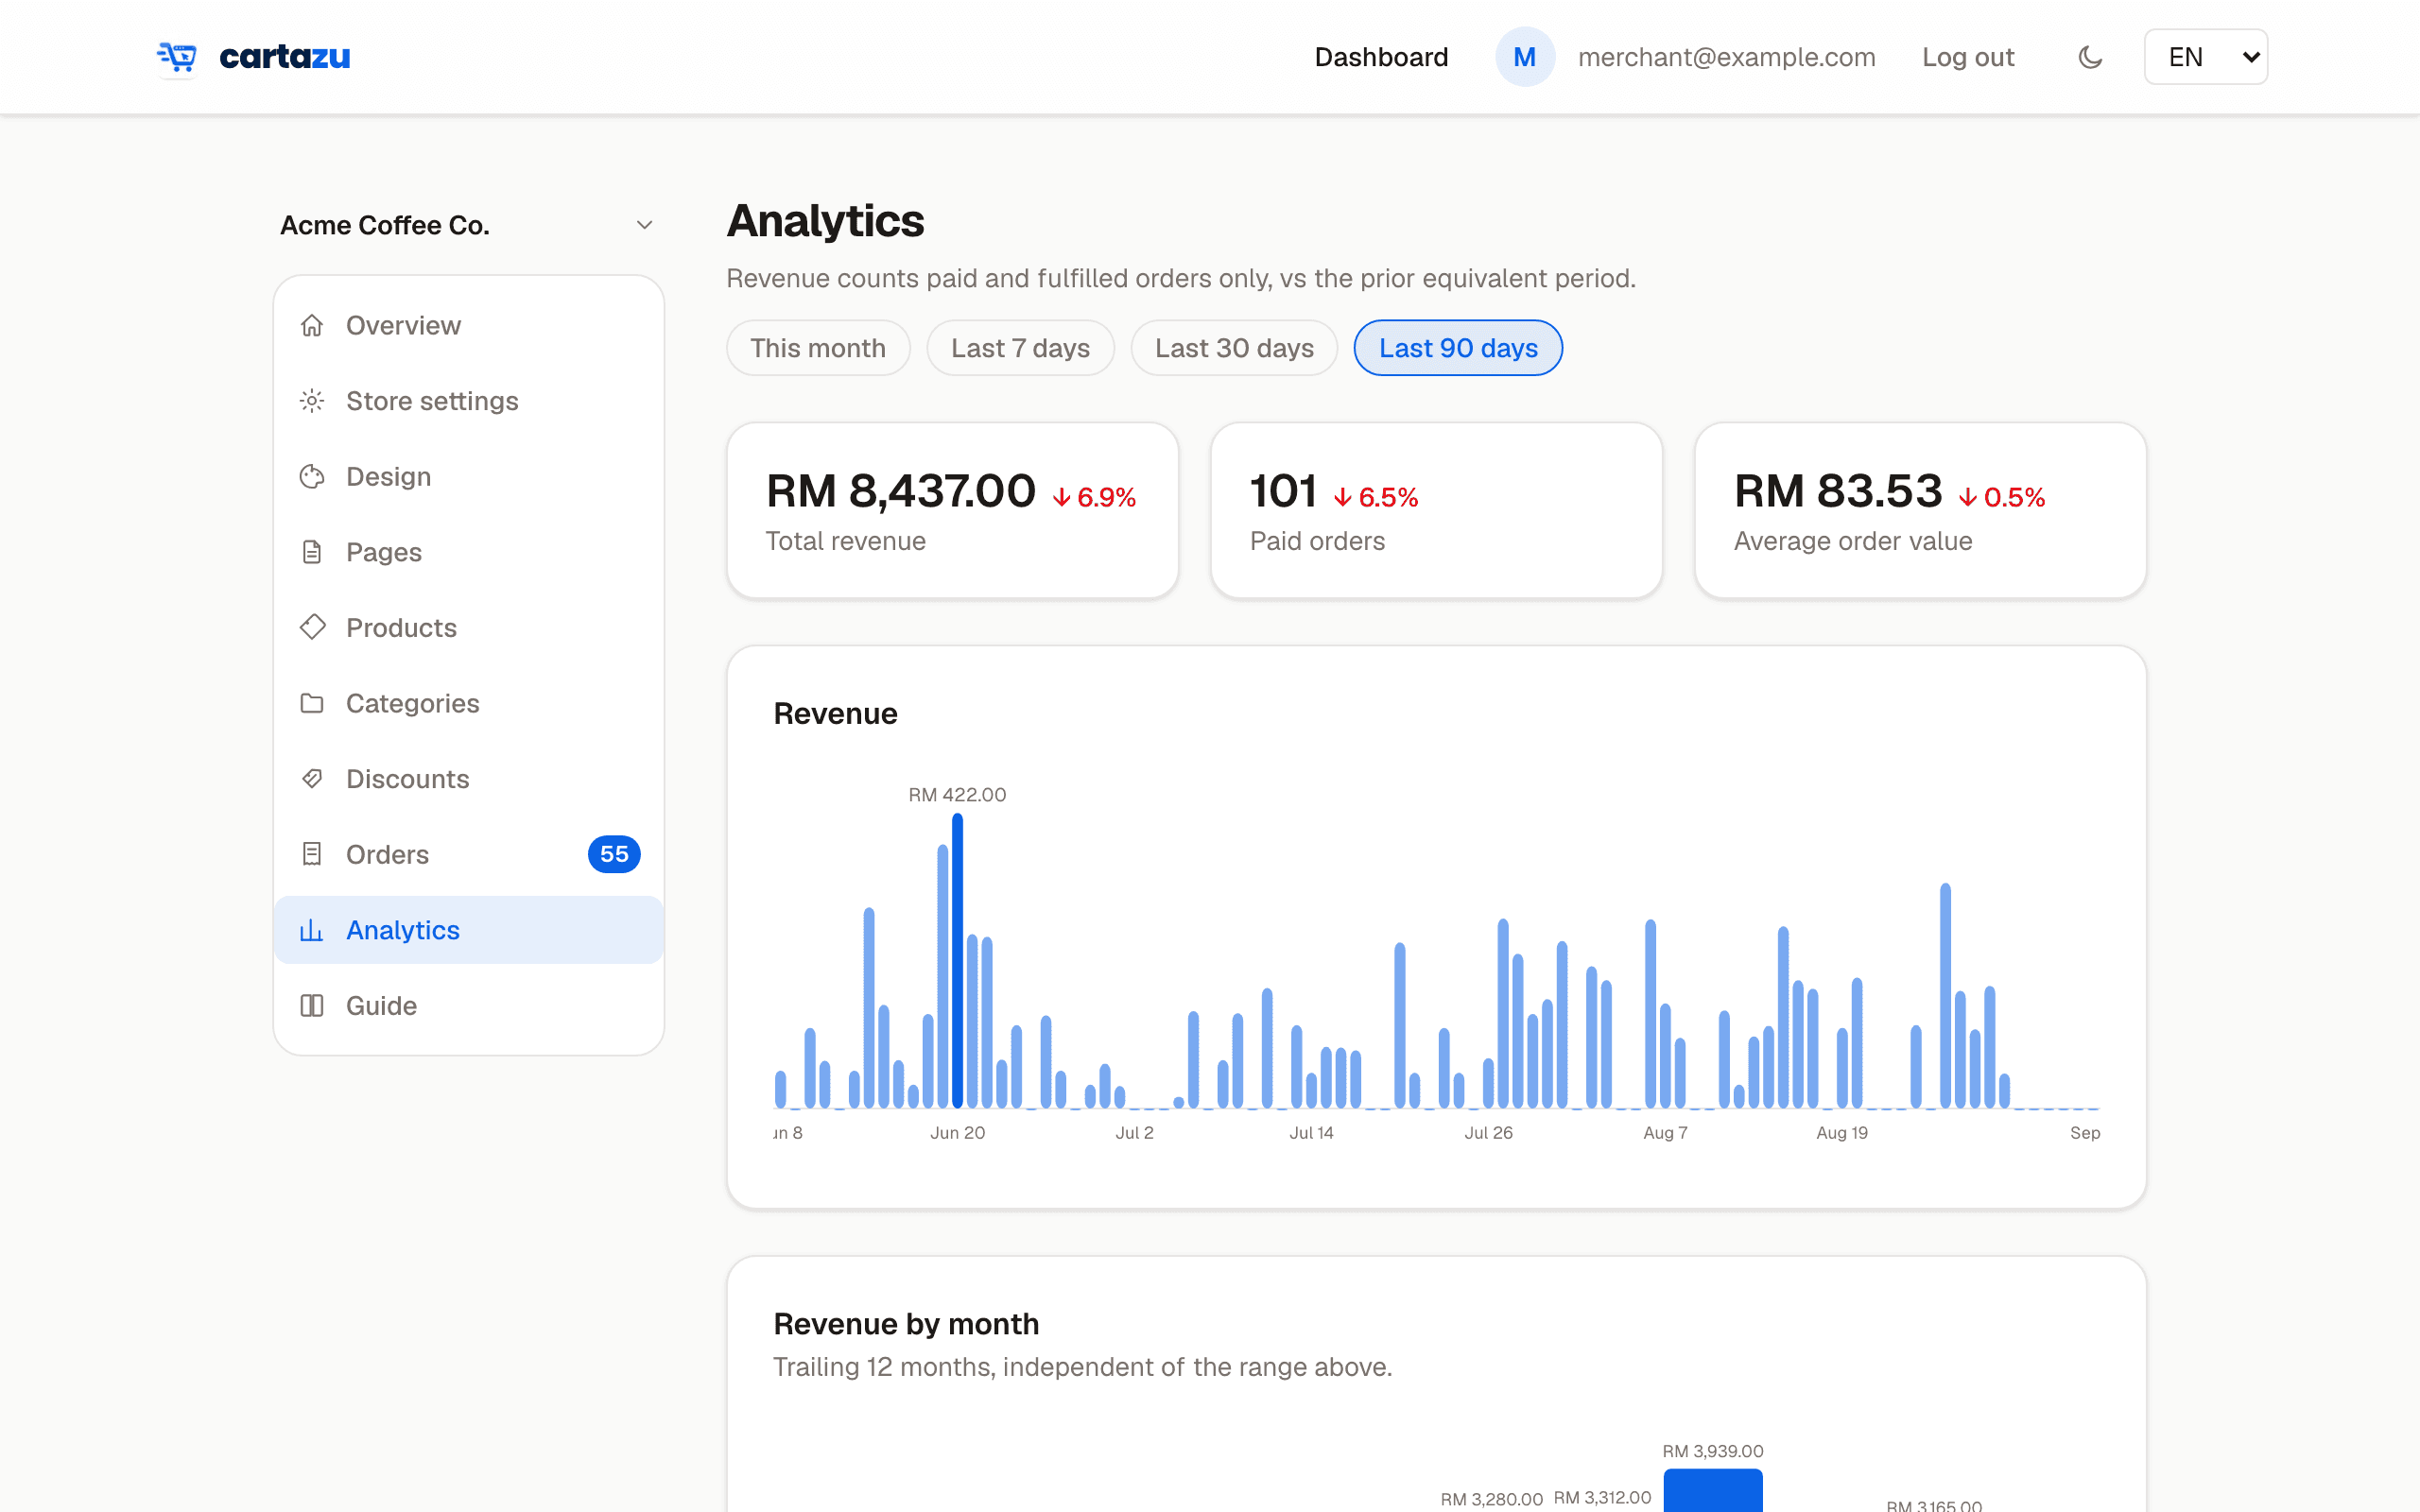
Your Analytics page covers four things, each for whatever date range you pick:
- Revenue and orders over time, with a comparison against the prior period so you know if you're trending up.
- What's selling — your top products and categories by revenue.
- Price points — how sales break down by how much each item cost.
- Traffic — page views and visitors, tracked automatically with no setup.
Hover any chart for the exact figure behind a bar — every chart responds to both mouse and keyboard.
Account
Plans & billing
| Plan | What you get |
|---|---|
| Free | Build and preview a store, up to 5 products — can't publish it live. |
| Starter | Publish one store, up to 25 products. |
| Advanced | Up to 5 businesses, unlimited products. |
Pay monthly or annually — annual works out to two months free. Manage or change your plan any time from Billing.
Account
Going live
A quick check before you tell anyone your store is open:
- Add your productsAt least the ones you want front and center — you can always add more later.
- Connect a payment methodAnd send yourself a small test order if you can — the fastest way to catch a setup mistake before a customer does.
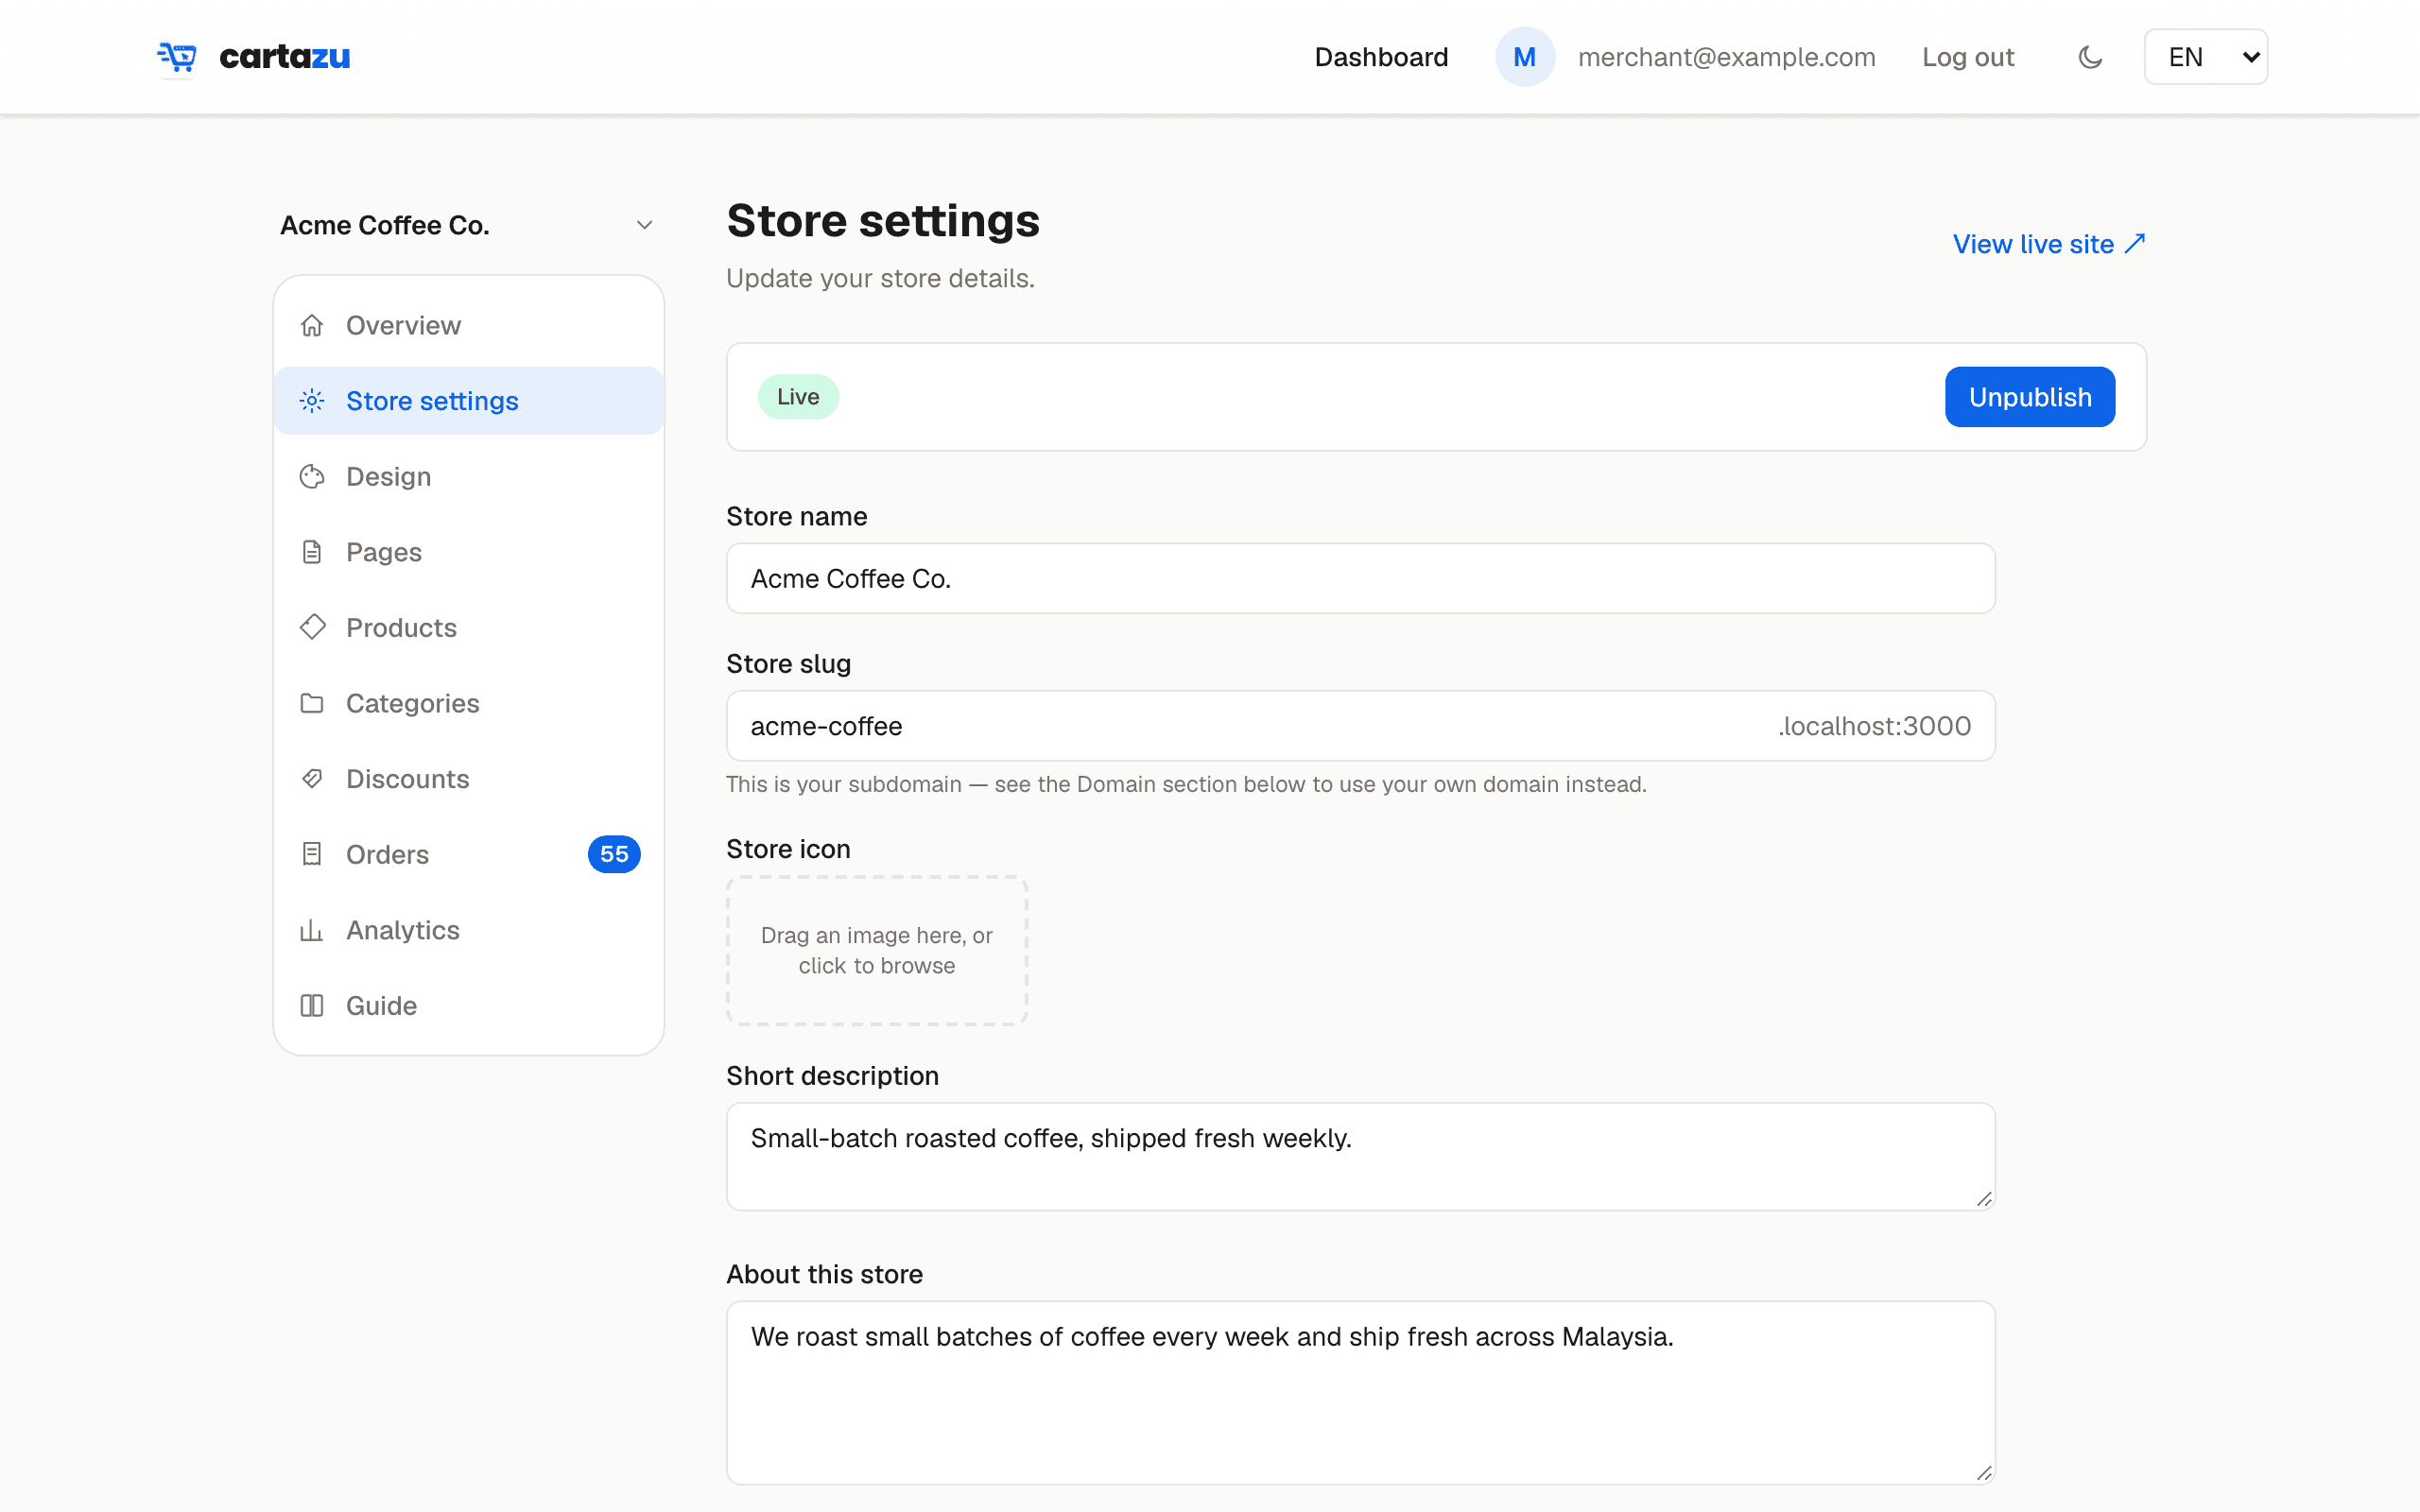
- PublishFrom Store settings, or right inside the page builder. This is the switch between "not open yet" and live.
Account
Getting help
Stuck on something this guide didn't cover, or think you've hit a bug? Reach out from inside your dashboard and include your store's address — it's the fastest way for support to look at exactly what you're seeing.